apollo 配置中心多环境部署
Apollo(阿波罗)是一款可靠的分布式配置管理中心,诞生于携程框架研发部,能够集中化管理应用不同环境、不同集群的配置,配置修改后能够实时推送到应用端,并且具备规范的权限、流程治理等特性,适用于微服务配置管理场景。
下载源码
gitree: https://gitee.com/apolloconfig/apollo
github: https://github.com/apolloconfig/apollo
文档地址:https://www.apolloconfig.com/#/zh/README 源码里面也有完整的文档,根目录下 docs doc 文件夹
下载完的代码目录
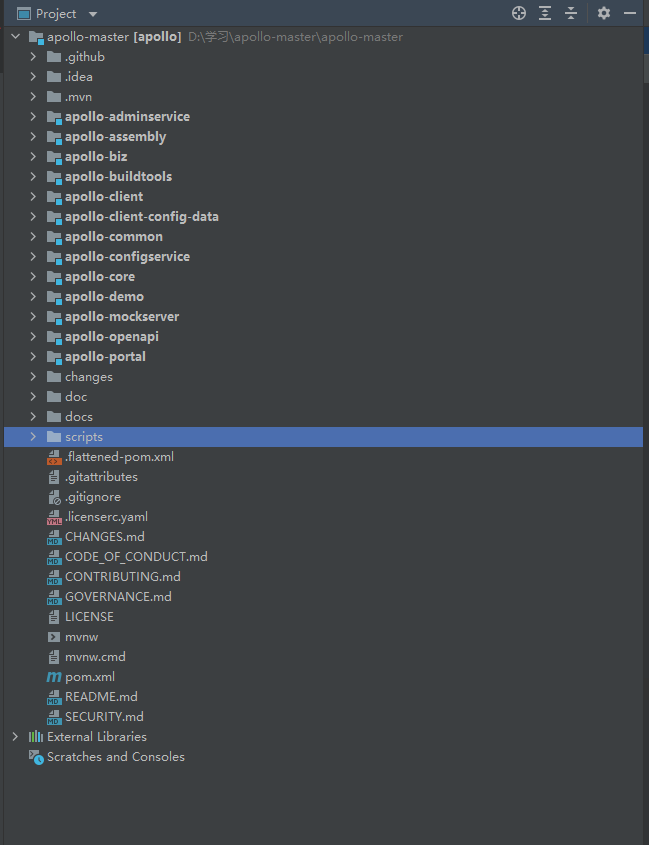
各模块介绍
config service
代码路径:apollo-configservice
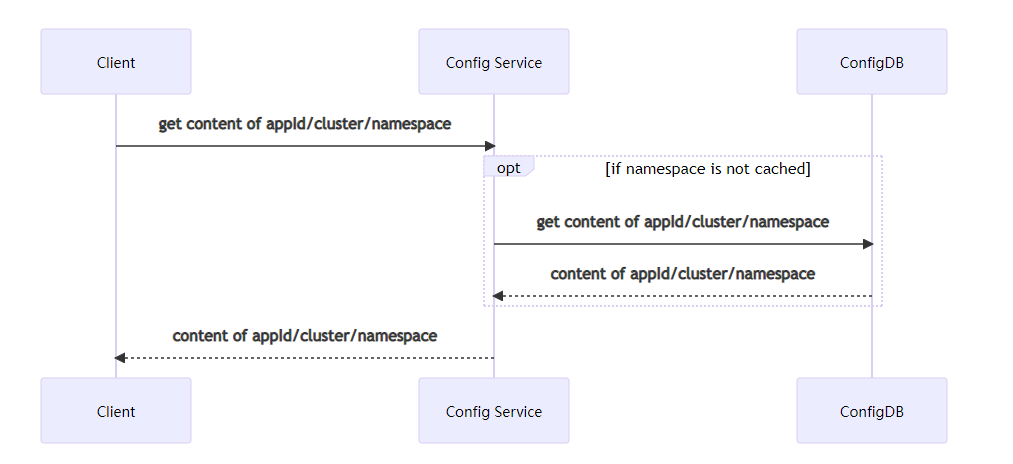
- 提供配置获取接口
- 提供配置更新推送接口(基于Http long polling)
- 服务端使用Spring DeferredResult实现异步化,从而大大增加长连接数量
- 目前使用的tomcat embed默认配置是最多10000个连接(可以调整),使用了4C8G的虚拟机实测可以支撑10000个连接,所以满足需求(一个应用实例只会发起一个长连接)。
- 接口服务对象为Apollo客户端
admin service
代码路径:apollo-adminservice
- 提供配置管理接口
- 提供配置修改、发布等接口
- 接口服务对象为Portal
protal
代码路径:apollo-protal
- 提供Web界面供用户管理配置
- 通过Meta Server获取Admin Service服务列表(IP+Port),通过IP+Port访问服务
- 在Portal侧做load balance、错误重试
源码编译部署
多环境部署就是每一套环境,部署一套 config service 和 admin service;protal 是一套。
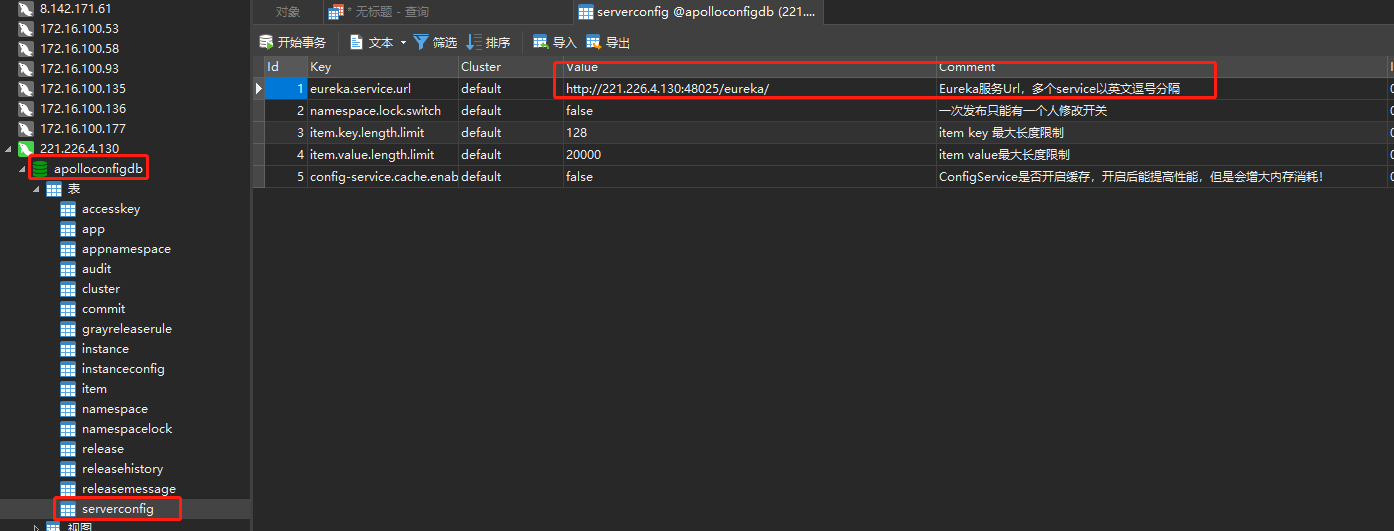
每个config service 和 admin service 也可以做集群横向扩展,使用同一套数据库,然后做个nginx反向代理负载均衡,protal里面配置代理后的地址;多个config service的时候,数据库的Eureka需要配置多个config的地址,它们会互相复制。
修改编译配置文件
源码下载下来可以直接拿IDEA打开,安装maven 直接安装依赖;或者直接运行 /script/build.sh 脚本进行打包。
build.sh
1 | |
数据库链接字符串一定要注意,源码中的默认格式低版本mysql不支持会报错
编译
配置文件修改后,开始打包,直接运行./build.sh,成功接口如下。
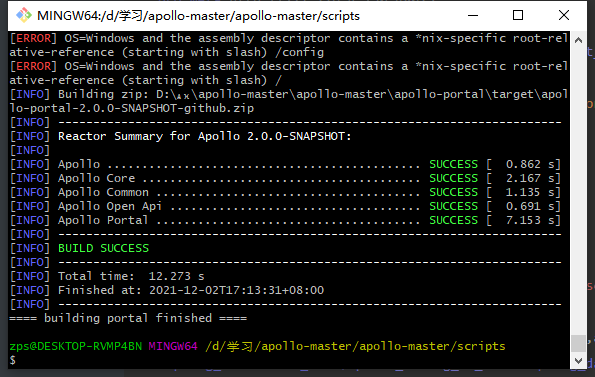
生成的包分别位于一下目录
- configservice:
apollo-configservice\target\apollo-configservice-2.0.0-SNAPSHOT-github.zip - adminservice:
apollo-adminservice\target\apollo-adminservice-2.0.0-SNAPSHOT-github.zip - protal:
apollo-portal\target\apollo-portal-2.0.0-SNAPSHOT-github.zip
部署
环境列表
| 服务器 | 环境名称 | 部署服务 |
|---|---|---|
| 172.16.100.92 | DEV | configservice,adminservice,protal |
| 221.226.4.130 | PRO | configservice,adminservice |
172.16.100.92
把 build.sh configservice 的配置文件改成 172.16.100.92 的配置。
apollo-configservice-2.0.0-SNAPSHOT-github.zip 上传到服务器,解压出来目录结构如下

如果想改启动端口,和日志输出目录,修改 script/startup.sh 的 LOG_DIR SERVER_PORT
启动:./script/startup.sh
停止: ./script/shutdown.sh
apollo-adminservice-2.0.0-SNAPSHOT-github.zip 上传到服务器,解压出来目录结构如下

如果想改启动端口,和日志输出目录,修改 script/startup.sh 的 LOG_DIR SERVER_PORT
启动:./script/startup.sh
停止: ./script/shutdown.sh
221.226.4.130
把 build.sh configservice 的配置文件改成 221.226.4.130 的配置。
部署启动过程同上。
protal
管理页面为了安全,部署到内网只能内网访问
把 build.sh meta server url 的配置文件改成对应的环境的地址,然后打包
1 | |
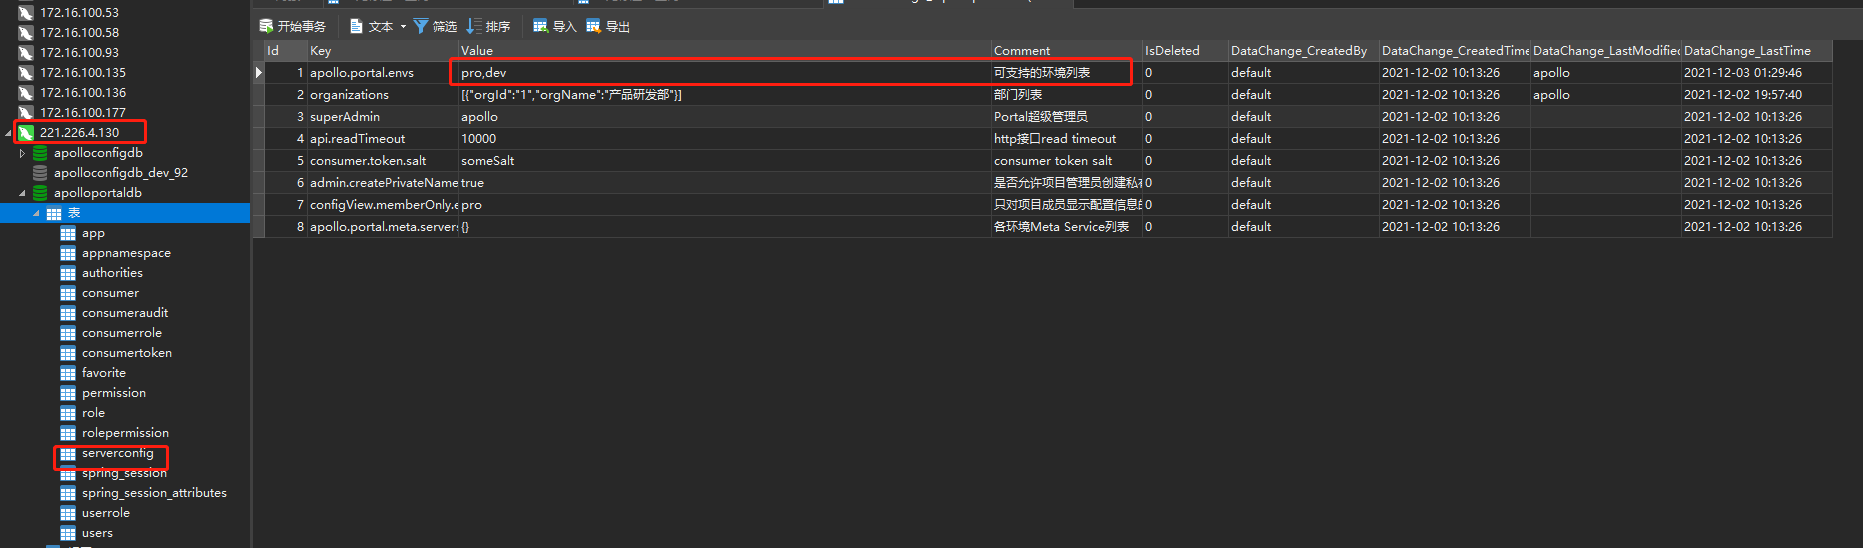
数据库修改环境列表
apollo-portal-2.0.0-SNAPSHOT-github.zip 上传到服务器,解压目录如下

如果想改启动端口,和日志输出目录,修改 script/startup.sh 的 LOG_DIR SERVER_PORT
启动:./script/startup.sh
停止: ./script/shutdown.sh
使用
默认登录账号密码 apollo/admin
创建应用可以添加多个 namespace,集群 对配置文件进行管理
问题排查
admin server 或者 config server 注册了内网IP,导致portal或者client访问不了admin server或config server
推荐第二种方案,直接在startup.sh 增加启动参数
分布式部署的时候,apollo-configservice和apollo-adminservice需要把自己的IP和端口注册到Meta Server(apollo-configservice本身)。
Apollo客户端和Portal会从Meta Server获取服务的地址(IP+端口),然后通过服务地址直接访问。
所以如果实际部署的机器有多块网卡(如docker),或者存在某些网卡的IP是Apollo客户端和Portal无法访问的(如网络安全限制),那么我们就需要在apollo-configservice和apollo-adminservice中做相关限制以避免Eureka将这些网卡的IP注册到Meta Server。
方案一: 忽略某些网卡
具体文档可以参考Ignore Network Interfaces章节。具体而言,就是分别编辑apollo-configservice/src/main/resources/application.yml和apollo-adminservice/src/main/resources/application.yml,然后把需要忽略的网卡加进去。
如下面这个例子就是对于apollo-configservice,把docker0和veth.*的网卡在注册到Eureka时忽略掉。
1 | |
注意,对于application.yml修改时要小心,千万不要把其它信息改错了,如spring.application.name等。
方案二:强制指定admin server和config server向eureka注册的IP
可以修改startup.sh,通过JVM System Property在运行时传入,如-Deureka.instance.ip-address=${指定的IP},或者也可以修改apollo-adminservice或apollo-configservice 的bootstrap.yml文件,加入以下配置
1 | |
方案三:强制指定admin server和config server向eureka注册的IP和Port
可以修改startup.sh,通过JVM System Property在运行时传入,如-Deureka.instance.homePageUrl=http://${指定的IP}:${指定的Port},或者也可以修改apollo-adminservice或apollo-configservice 的bootstrap.yml文件,加入以下配置
1 | |
做完上述修改并重启后,可以查看Eureka页面(http://${config-service-url:port})检查注册上来的IP信息是否正确。
注:如果Apollo部署在公有云上,本地开发环境无法连接,但又需要做开发测试的话,客户端可以升级到0.11.0版本及以上,然后通过
-Dapollo.configService=http://config-service的公网IP:端口来跳过meta service的服务发现,记得要对公网 SLB 设置 IP 白名单,避免数据泄露